|
Ford Crown Victoria / Mercury Grand Marquis
Rear Speaker Replacement Instructions
|
Removal and Replacement Instructions
(steps 11-20 of 20)
You now need to connect the after-market speakers to the factory speaker connections. Aftermarket speakers have
(2) spade-type connectors. The factory Ford speaker connector is a single plug-in type connector. If your speakers
came with wiring adapters (these are available from Crutchfield and are often included if you buy your speakers
from them) you can just plug one end of the adapter into the speaker and one into the factory connector and
skip down to step 11 below. If you don't have wiring adapters, then
Click Here and we'll show you how to make your own.
- Connect the speaker wiring adapter to the speaker and to the factory connector in the car.
- Neatly push the speaker wire into the speaker opening (making sure it doesn't get "pinched" when you install
the speaker) and install the new speaker (3 screws if you are installing a round speaker - 4 screws if you
removed the adapter plate and are installing a 6x9 speaker).
NOTE: There is a foam, cup-shaped baffle that
fits under the speaker on some of these cars. It's just sound insulation to keep noise from the rear of the
vehicle from "getting in" through the speaker openings (after all, these cars are designed to be quiet). If you
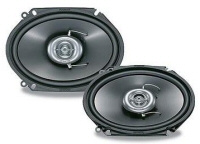
are using round speakers (5 1/4 or 6 1/2) then you're good to go. If you are using 6x9 speakers (especially if
they have large magnets like ours) the foam insulation "cup" may not fit. If so, simply remove it and continue.

- Repeat steps 11 and 12 for the other side of the car. Both speakers should now be installed and you're
are ready for a quick test and then re-assembly.
- Before re-installing everything else, let's make sure the speakers work as they should. Put the key in the
ingniton and turn it to "accessory" and turn on the radio. Use the balance and fader controls to make sure
both speakers are working properly. Be sure and turn it up loud enough to make sure the speakers don't "rattle"
and that they Rock-your-ride like they should. If all sounds good, continue on. If not, re-check that the speakers
are mounted tightly and that your connections are good and solid.
- Slide the rear deck covering back in place and re-secure it with the two (2) plastic push-in connectors.
- Re-connect the 3rd brake light connector and re-install the brake light housing by replacing the two (2)
screws on each side of the housing.
- Re-install the rear seat back and tighten the two (2) 18mm nuts which secure the seat back.

- Re-install the upper seat belt mount covers. They simply snap back in place.
- Re-install the lower seat cushion by pushing in (rearward) and down. You should feel it "hook" into place.
Firmly tug on it on both sides to confirm it is secure and hooked on both mounts. You woulnd't want your
rear seat cushion flying around the car in case of a panic stop.
- Turn on the radio again and double check the everything sounds as it should. If not, refer to the
Troubleshooting section for this repair/upgrade.
If your rear speakers sound clear and full, congratulations! You've now successfully upgraded your rear speakers and
are ready to play some tunes. Also, if you haven't already, you'll probably want to upgrade your front (door)
speakers as well. We've got detailed instructions for that upgrade as well. Just
click here for details on upgrading the front speakers. Lastly, please take a minute to drop us a line
and give us some feedback
on the content of this site. We're always trying to improve our content and we love getting feedback from
fellow Do-It-Yourselfers
|
|
|

Previous
|

Next
|
Copyright © 2006-2010 by AutoClinix. All rights reserved. Unauthorized duplication in whole or in part is strictly prohibited.
|
|